组装 Solidworks 装配
1. 在
“原始点”(Home) 选项卡上单击
 “新建”(New)
。
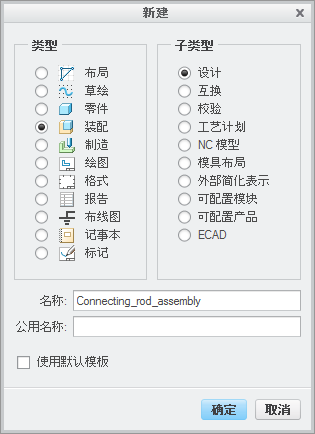
“新建”(New) 对话框随即打开。
a. 在“类型”(Type) 下,单击“装配”(Assembly)。
b. 在“名称”(Name) 框中键入 connecting_rod_assembly。
c. 清除“使用默认模板”(Use default template) 复选框。
d. 单击“确定”(OK)。“新文件选项”(New File Options) 对话框打开。
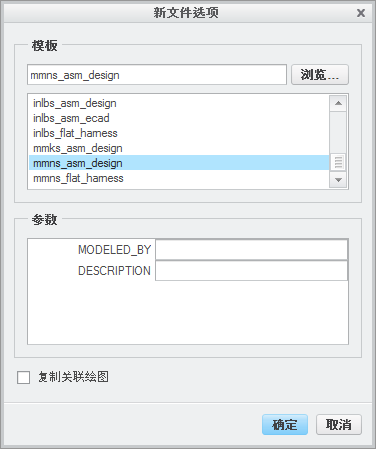
2. 在“新文件选项”(New File Options) 对话框中执行以下操作:
a. 在“模板”(Template) 下,选择 mmns_asm_design。
b. 单击“确定”(OK)。
3. 在
“模型”(Model) 选项卡的
“元件”(Component) 组中,单击
 “组装”(Assemble)
。
“打开”(Open) 对话框打开。
4. 从“类型”(Type) 下拉列表中选择 SolidWorks Assembly (*.sldasm)。
5. 选择 connecting_rod_assembly_sw.SLDASM,然后单击“导入”(Import)。“导入新模型”(Import New Model) 对话框随即打开。
6. 单击“确定”(OK)。零件在图形窗口中打开,且“元件放置”(Component Placement) 选项卡随即打开。
7. 在图形窗口中单击鼠标右键,然后单击“默认约束”(Default Constraint)。
8. 在
“元件放置”(Component Placement) 选项卡中,单击

。
9. 在“快速访问”工具栏上,单击
 “保存”(Save)
,然后单击
 “关闭”(Close)
。